Recent Posts

Showing posts with label stamp storage. Show all posts

03/12/2013

Acrylic Stamp Storage Idea

Alright, so as many of you know, I have a lot of stamps. Some of you saw my posts on Instagram when we were moving that I didn't realize how many stamps I had until I had to pack them up (it was like that for the majority of my supplies). Shortly before we decided we were moving, I had been looking into different storage solutions for my acrylic stamps because my collection was growing quickly and the way I'd been storing them at the time (a couple of boxes), started to not be enough space to hold them. I needed something that I could easily expand if my collection grew any more (it's still growing).

I scoured Pinterest and there were some wonderful ideas, but one that stood out was to put them into pocket pages and put them in a binder. At first I thought that was kind of stupid. How would you remember which stamps were grouped together? What would you do with all those acetate sheets from them?

Then I realized I was being an idiot. I started out by buying a whole bunch of 8 1/2 x 11" pocket pages. Terrible idea. Pocket pages come in a variety of sizes, you just have to know where to look. So I went to staples again and looked at all the pocket pages they had. They had 8 1/2 x 11, baseball card (9 - 3"x2" slots), and business card holders (way too small for any stamp sets I own). Then I wandered to the Martha Stewart section and they had a set with two pockets on an 8 1/2" x 11" sheet, and one with four pockets. Those are the ones I used the most of. The majority of my stamp sets fit into one or the other. I also have a large collection of little $1 stamps from Michaels (the little set of one or two stamps) and those fit nicely into baseball card pages.


Here's the four binders that hold the majority of my Acrylic Stamps. I still have some that I need to unpack from the grab box which is still sitting on the floor in the craft room full of things I need to put away. (The brown binder is actually a photo album, but it works just as well).


I labelled them with sticky notes because I've been rearranging different groups of stamps to make the binders mostly equal. For example, I have a lot of Christmas stamps, but not many Birthday stamps, so I've moved them into the same binder because they don't overflow it.


I placed dividers into my binders to put more distinction on the sections. They don't stick out past the pocket pages, but they still allow me to keep things a little more organized.


Here's a photo of the Martha Stewart pocket pages with 2 pockets. Most stamp sets will fit into this size of pocket page, as you can see they're pretty wide and my Recollections font sets aren't very big.


Here's an example of the Martha Stewart 4 pocket pages. They fit most of my slightly smaller stamps in them. The ones that didn't fit these pockets went into the two pocket pages. 


Here's one of my baseball card pages full of $1 stamps from Michaels. They fit almost perfectly, some of them I had to trim down to squeeze them in, but they still fit nicely and I can see them better this way.

I'd love to see how you organize your stamps! E-mail me your Stamp Storage photos creationsbycoal@gmail.com

Have a wonderful Tuesday!
-Alex

01/08/2013

Shopping Haul and Storage

Almost every time I go to the nearest city, I can't help but pick up crafting supplies. I almost need an intervention or something, but I promise to eventually use everything I have currently.

First up, I bought more wire cubes from Walmart for my paper stack storage (original post can be found here). Let me just say that I hate these ones because they're different than my other ones. The original set I have is Rubbermaid, and the little circle connector pieces are sturdy and nearly impossible to get on/off, which is GOOD. That means when I'm dragging it across the floor it doesn't start falling apart.

I found all the extra connector pieces from the first set of cubes, and replaced the terrible ones so that it won't fall apart. Thank goodness. The last thing anyone wants is to come home from work and find a giant paper mess everywhere.


Here's my complete paperstack unit currently. I made two entire cubes again and just stacked the top one on top of the bottom one. They're not currently attached to each other so I can take the top two cubes off and move it easily. I realize now that I could use a couple more to get all of my 12 x 12" sheets onto racks like this. I like that I can see all the colours on the top just by standing there looking at them, and all my paperstacks are right there within reach as well. When I have more wall space they probably won't be stacked, or they'll actually be attached to each other.


Last week I went shopping for a few items for my penpals, and conditioner. I stumbled across this adorable binder. I love owls in case you didn't know. I knew immediately that with some pocket pages this would be exactly what I needed to get all my stamps into manageable storage.


I only bought 8 1/2" x 11" pocket pages for now so I could measure my other stamps and see how small I could go and how many I would need. I simply slipped my stamps into the pages, leaving them attached to the plastic sheets they came on. I started with the larger stamps, and left the others in the box. I'll get more pages and show you the finished project when I finally get them all into it. I also need to get dividers so I can sort them by season/use/holiday.


Last year I did a lot of my Christmas cards on the go because Jon was working a lot, and my basement was way too cold to work in for a long period of time. I found this at Walmart, and since I figure I'll be crafting Christmas cards on the go again, this will keep all my tools together in one place. I can also use it when I'm penpalling on the go. It's a win win.


I love these stamps. I have 4-5 sets of stamps like these for different purposes. I have a baby set that I used on some baby cards a while back, a Christmas set that I used for a custom order last year, and a Graduation set that I used when I graduated from college. I also love that they include a little block for them. It's the perfect size!


I don't use permanent markers a lot, but I couldn't pass these up. Who doesn't want neon Sharpies? You never know when they might come in handy! I love the Sharpie pens for writing letters.


Jon got a Staples gift card with his credit card points, so I picked up some much needed cardstock. I prefer Staples for most of my 8 1/2" x 11" cardstock because it comes in these giant packs and it's so much cheaper. I buy all of my white cardstock from them because I go through it the most!


The colours on the front don't even closely match the actual colours of the paper. The top 5 colours are the package on the left, and the bottom 5 are the package on the right. I love love love the purple and pink in the bottom stack. The yellow's are practically the same, guess I'll need to start using more yellow.

Hope you all have a wonderful Thursday! Only one more day until the long weekend! Hooray!

-Alex

08/07/2013

Stamp Storage

Good morning readers! I hope that you all enjoyed your weekend! When I wasn't at work this weekend, I was laying around instead of working on posts for this week, so my apologies with this being a little late!
Today I'm going to share with you, a unique piece of furniture that I currently use to store my wooden stamps. It's a great idea, but the size isn't very practical, and I'm still not sure how to arrange everything to get the most out of the piece. Suggestions are always welcome!


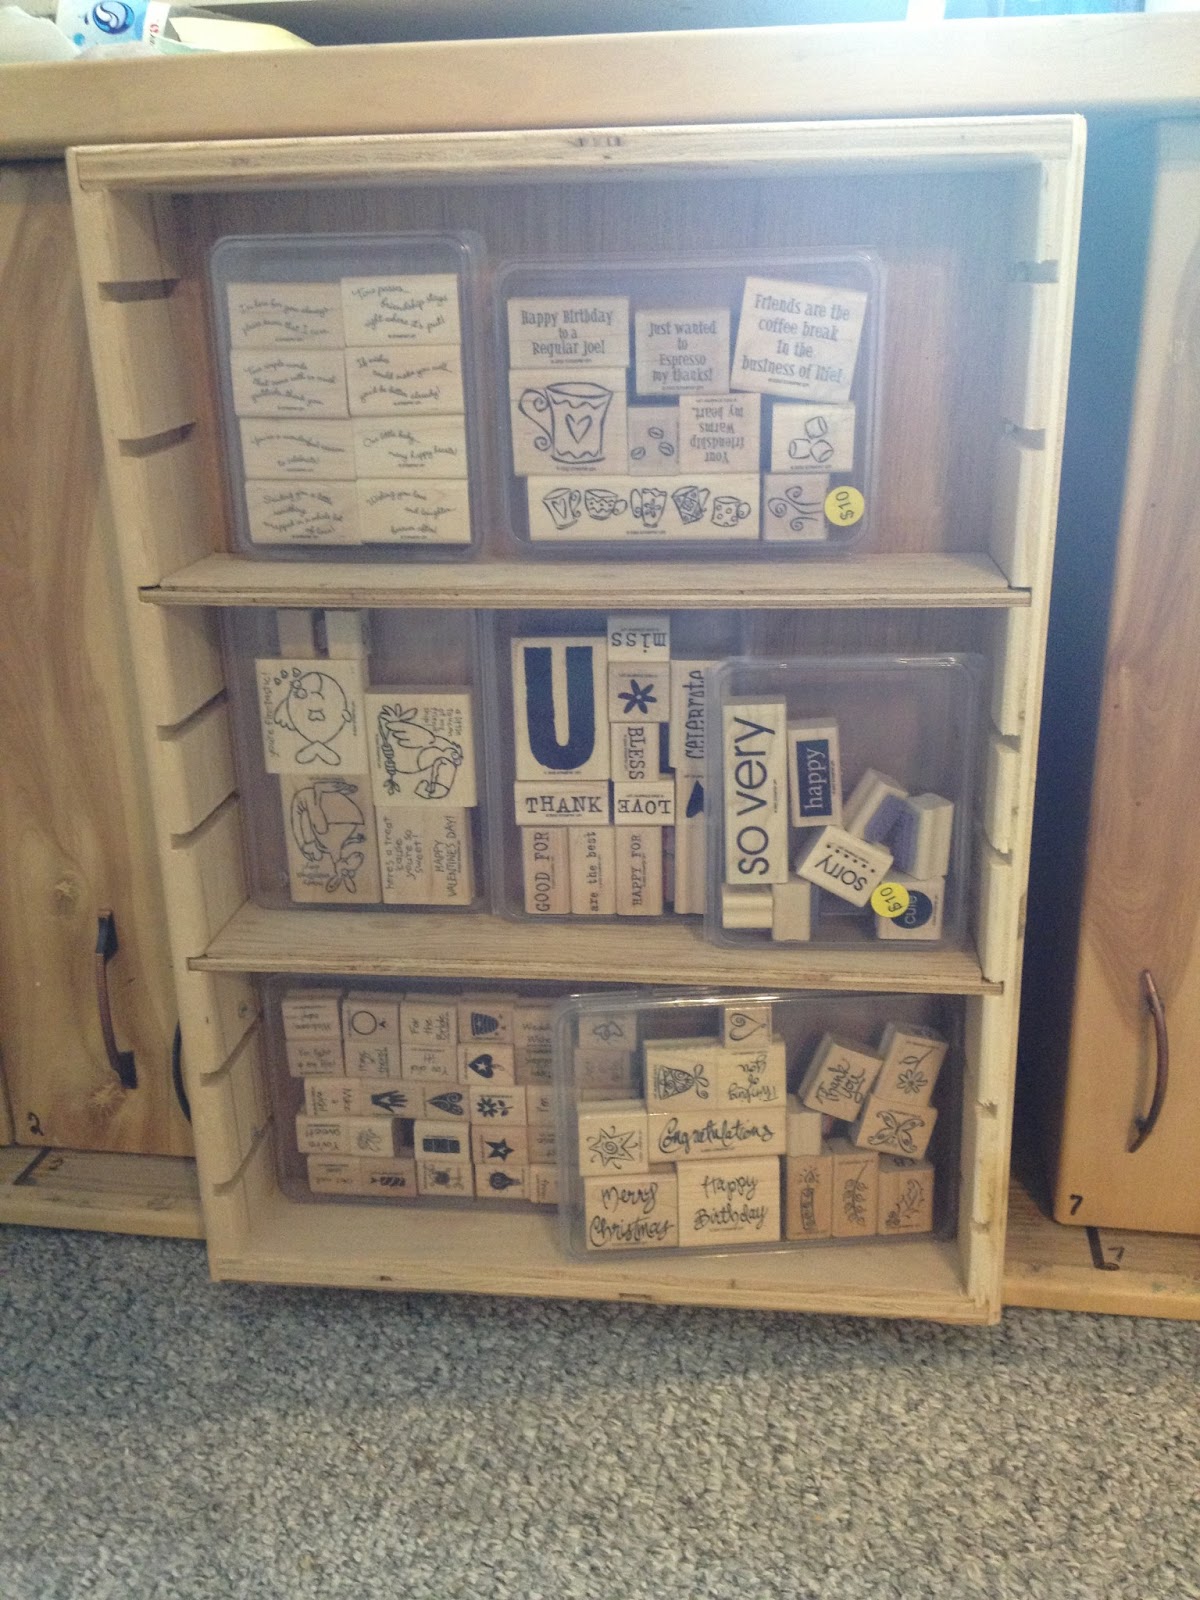
Here's the piece of furniture. It looks like sideways drawers. They slide out, and then swing to the left to allow you great access to everything in them. I picked this up at my neighbours garage sale (when I also picked up my desk). In the future, I'd like to change the hardware, and possibly the colour.


The first few drawers are too close to the wall to swing open, but they currently hold most of my Stampin Up sets. In a couple of places they're stacked in front of each other, but the ones in the back I don't use as often.


The middle drawer holds all the extra shelves from the smaller drawers. Mostly because the shelf that's in this one, is in the wrong spot, and it's currently stuck there. I didn't want to break it, so I just left it and piled extra shelves into it. I love that most of the shelves were adjustable, and in the future, they will come in really handy when I decided exactly how I want my stamps to be stored, or if I decide to just use it for something else.


The Stampin Up sets that I use a lot more often are in the front drawers for easier access. You can also see how the drawers swing in front of the other ones to allow easier viewing of the drawer contents.


In the last drawer I have all of my loose stamps that I've picked up during multiple shopping trips. These I use a lot with my letters and outgoing mail. Having them stored like this makes me want to separate my Stampin Up sets and sort everything by occasion, but at the same time, I like that my Stampin Up sets are together so I can combine different stamps from the same set.

There are so many ways to store stamps, and currently, I feel as though this isn't working very effectively for me. My stamps are on the opposite side of my crafting space, because it's the only place this piece would fit without getting in the way. I feel like out of sight out of mind really applies to these. I seem to use my acrylic stamps more because they sit on my desk where I can see them. In the future I think I'd like to make a large shelf unit to place my stamps on so I can simply browse it and see every stamp I have, all at once. Maybe I'd use more of them!

Have a wonderful Monday!!
-Alex