Recent Posts

Showing posts with label storage. Show all posts

28/07/2014

Michael's Haul #8

My hauls keep getting smaller and smaller because I've begun to realize that I have way too much stuff. Okay that's a lie. I just feel that I can't think of anything to use a lot of what I see for. I'm currently more focused on trying to organize my supplies in such a way that I can see them and I'll start to use them.

.
I bought three more bead organizers. They're super handy for storing different embellishments (paper punch outs, buttoms, die cuts, etc.) by colour, theme, etc. I also picked up two more sets of Tim Holtz binder rings. I'll share my project made using them later on (when I actually finish it).


I've been growing my punch collection as well. I bought a medium star, medium heart, large hexagon, and a mustache bowtie combo. Perfect for cake toppers. 


I bought two different Colourbox Petal ink pads. I've never used the petal inks before, but I'm excited to try all the new colours. I also bought a bunch of thickers. Two sets of map thickers, one set of kraft corrugated paper thickers, two sets of  black, one set of white, and one set of lowercase black. I never used to like alphabet stickers, but I've grown to love using them in project life.

Thanks for stopping by! Sorry this haul wasn't as exciting as past hauls. I've been exploring storage options and some new furniture pieces for the craftroom. I was also shopping in Saskatchewan, so there was extra taxes (boo!). 

Have a great day!
-Alexandria

03/12/2013

Acrylic Stamp Storage Idea

Alright, so as many of you know, I have a lot of stamps. Some of you saw my posts on Instagram when we were moving that I didn't realize how many stamps I had until I had to pack them up (it was like that for the majority of my supplies). Shortly before we decided we were moving, I had been looking into different storage solutions for my acrylic stamps because my collection was growing quickly and the way I'd been storing them at the time (a couple of boxes), started to not be enough space to hold them. I needed something that I could easily expand if my collection grew any more (it's still growing).

I scoured Pinterest and there were some wonderful ideas, but one that stood out was to put them into pocket pages and put them in a binder. At first I thought that was kind of stupid. How would you remember which stamps were grouped together? What would you do with all those acetate sheets from them?

Then I realized I was being an idiot. I started out by buying a whole bunch of 8 1/2 x 11" pocket pages. Terrible idea. Pocket pages come in a variety of sizes, you just have to know where to look. So I went to staples again and looked at all the pocket pages they had. They had 8 1/2 x 11, baseball card (9 - 3"x2" slots), and business card holders (way too small for any stamp sets I own). Then I wandered to the Martha Stewart section and they had a set with two pockets on an 8 1/2" x 11" sheet, and one with four pockets. Those are the ones I used the most of. The majority of my stamp sets fit into one or the other. I also have a large collection of little $1 stamps from Michaels (the little set of one or two stamps) and those fit nicely into baseball card pages.


Here's the four binders that hold the majority of my Acrylic Stamps. I still have some that I need to unpack from the grab box which is still sitting on the floor in the craft room full of things I need to put away. (The brown binder is actually a photo album, but it works just as well).


I labelled them with sticky notes because I've been rearranging different groups of stamps to make the binders mostly equal. For example, I have a lot of Christmas stamps, but not many Birthday stamps, so I've moved them into the same binder because they don't overflow it.


I placed dividers into my binders to put more distinction on the sections. They don't stick out past the pocket pages, but they still allow me to keep things a little more organized.


Here's a photo of the Martha Stewart pocket pages with 2 pockets. Most stamp sets will fit into this size of pocket page, as you can see they're pretty wide and my Recollections font sets aren't very big.


Here's an example of the Martha Stewart 4 pocket pages. They fit most of my slightly smaller stamps in them. The ones that didn't fit these pockets went into the two pocket pages. 


Here's one of my baseball card pages full of $1 stamps from Michaels. They fit almost perfectly, some of them I had to trim down to squeeze them in, but they still fit nicely and I can see them better this way.

I'd love to see how you organize your stamps! E-mail me your Stamp Storage photos creationsbycoal@gmail.com

Have a wonderful Tuesday!
-Alex

01/08/2013

Shopping Haul and Storage

Almost every time I go to the nearest city, I can't help but pick up crafting supplies. I almost need an intervention or something, but I promise to eventually use everything I have currently.

First up, I bought more wire cubes from Walmart for my paper stack storage (original post can be found here). Let me just say that I hate these ones because they're different than my other ones. The original set I have is Rubbermaid, and the little circle connector pieces are sturdy and nearly impossible to get on/off, which is GOOD. That means when I'm dragging it across the floor it doesn't start falling apart.

I found all the extra connector pieces from the first set of cubes, and replaced the terrible ones so that it won't fall apart. Thank goodness. The last thing anyone wants is to come home from work and find a giant paper mess everywhere.


Here's my complete paperstack unit currently. I made two entire cubes again and just stacked the top one on top of the bottom one. They're not currently attached to each other so I can take the top two cubes off and move it easily. I realize now that I could use a couple more to get all of my 12 x 12" sheets onto racks like this. I like that I can see all the colours on the top just by standing there looking at them, and all my paperstacks are right there within reach as well. When I have more wall space they probably won't be stacked, or they'll actually be attached to each other.


Last week I went shopping for a few items for my penpals, and conditioner. I stumbled across this adorable binder. I love owls in case you didn't know. I knew immediately that with some pocket pages this would be exactly what I needed to get all my stamps into manageable storage.


I only bought 8 1/2" x 11" pocket pages for now so I could measure my other stamps and see how small I could go and how many I would need. I simply slipped my stamps into the pages, leaving them attached to the plastic sheets they came on. I started with the larger stamps, and left the others in the box. I'll get more pages and show you the finished project when I finally get them all into it. I also need to get dividers so I can sort them by season/use/holiday.


Last year I did a lot of my Christmas cards on the go because Jon was working a lot, and my basement was way too cold to work in for a long period of time. I found this at Walmart, and since I figure I'll be crafting Christmas cards on the go again, this will keep all my tools together in one place. I can also use it when I'm penpalling on the go. It's a win win.


I love these stamps. I have 4-5 sets of stamps like these for different purposes. I have a baby set that I used on some baby cards a while back, a Christmas set that I used for a custom order last year, and a Graduation set that I used when I graduated from college. I also love that they include a little block for them. It's the perfect size!


I don't use permanent markers a lot, but I couldn't pass these up. Who doesn't want neon Sharpies? You never know when they might come in handy! I love the Sharpie pens for writing letters.


Jon got a Staples gift card with his credit card points, so I picked up some much needed cardstock. I prefer Staples for most of my 8 1/2" x 11" cardstock because it comes in these giant packs and it's so much cheaper. I buy all of my white cardstock from them because I go through it the most!


The colours on the front don't even closely match the actual colours of the paper. The top 5 colours are the package on the left, and the bottom 5 are the package on the right. I love love love the purple and pink in the bottom stack. The yellow's are practically the same, guess I'll need to start using more yellow.

Hope you all have a wonderful Thursday! Only one more day until the long weekend! Hooray!

-Alex

31/07/2013

Washitape Wednesday

I couldn't think of anything to post last night, and this morning I found a stack of letters I need to envelope and get in the mail, so I did a washitape envelope. It's super quick and simple.


Here's the envelope before I put the address label onto it. I used various shades of blue/teal.


I angled the address label so I wasn't completely hiding the washitape in the middle. I think I'm going to make more like this!


In other Washitape Wednesday news, Jon picked up a couple more racks (on top of the far right rack). I still need more to get all my multi-coloured rolls onto racks, but I'm happy with how it's starting to look. I'll get it all onto racks, and everything where I like it, and then we're going to move and I'll have to reorganize all over again!

Hope you all have a wonderful Wednesday. Don't forget to share your projects over at Crafting a Fairytale.
-Alex


08/07/2013

Stamp Storage

Good morning readers! I hope that you all enjoyed your weekend! When I wasn't at work this weekend, I was laying around instead of working on posts for this week, so my apologies with this being a little late!
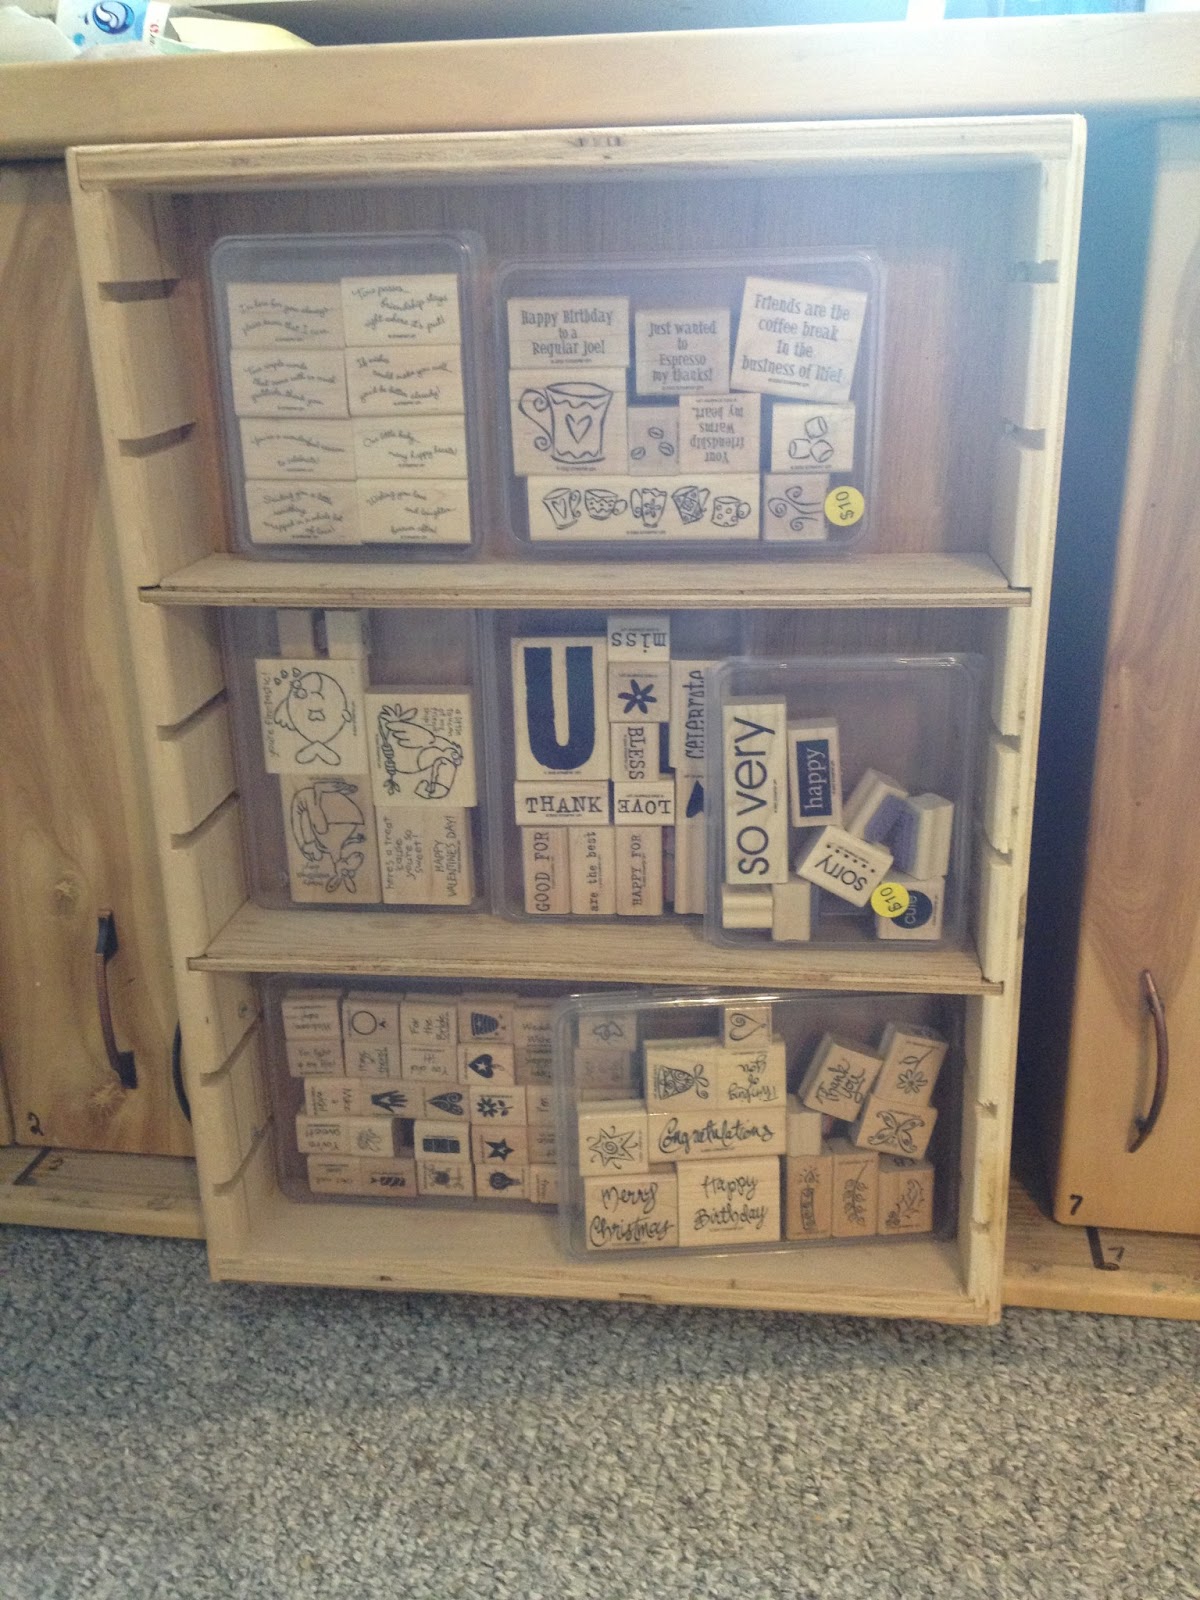
Today I'm going to share with you, a unique piece of furniture that I currently use to store my wooden stamps. It's a great idea, but the size isn't very practical, and I'm still not sure how to arrange everything to get the most out of the piece. Suggestions are always welcome!


Here's the piece of furniture. It looks like sideways drawers. They slide out, and then swing to the left to allow you great access to everything in them. I picked this up at my neighbours garage sale (when I also picked up my desk). In the future, I'd like to change the hardware, and possibly the colour.


The first few drawers are too close to the wall to swing open, but they currently hold most of my Stampin Up sets. In a couple of places they're stacked in front of each other, but the ones in the back I don't use as often.


The middle drawer holds all the extra shelves from the smaller drawers. Mostly because the shelf that's in this one, is in the wrong spot, and it's currently stuck there. I didn't want to break it, so I just left it and piled extra shelves into it. I love that most of the shelves were adjustable, and in the future, they will come in really handy when I decided exactly how I want my stamps to be stored, or if I decide to just use it for something else.


The Stampin Up sets that I use a lot more often are in the front drawers for easier access. You can also see how the drawers swing in front of the other ones to allow easier viewing of the drawer contents.


In the last drawer I have all of my loose stamps that I've picked up during multiple shopping trips. These I use a lot with my letters and outgoing mail. Having them stored like this makes me want to separate my Stampin Up sets and sort everything by occasion, but at the same time, I like that my Stampin Up sets are together so I can combine different stamps from the same set.

There are so many ways to store stamps, and currently, I feel as though this isn't working very effectively for me. My stamps are on the opposite side of my crafting space, because it's the only place this piece would fit without getting in the way. I feel like out of sight out of mind really applies to these. I seem to use my acrylic stamps more because they sit on my desk where I can see them. In the future I think I'd like to make a large shelf unit to place my stamps on so I can simply browse it and see every stamp I have, all at once. Maybe I'd use more of them!

Have a wonderful Monday!!
-Alex


25/06/2013

Paper Stack Storage Solution

Alright, so for those of you who know me, I have a love of paper. There has only been a handful of times that I've gone shopping, and not bought at least one paper stack. Unfortunately, that means that I have A LOT of paper.
I don't know that there is any right way to store it, but while browsing my Instagram feed, I came across a crafty lady who had come done what I'm about to show you. I thought it was the smartest thing I'd ever seen!
At some point I'd like to get more shelves so I can store all of my paper this way, and not just my paper stacks.
So, there's my shelf. I'm sure you've seen them at Walmart and thought "What would I ever use that for? Things would fall through the holes". They also have fabric boxes that could fit into the cubes. It worked for other things for a while, but I decided that it wasn't working for me that way. So I took it apart and found some metal ties (metal twist ties from bread or garbage bags work).


I assembled two of the cubes and used the remaining pieces (plus two I took from another one of these) to make this. I used twist ties to secure each shelf to the outside in five places. Two on either side and one on the back in the middle. Then I slid all of my paper stacks into it and ta da. You could also use this for individual sheets, just put similar patterns/colours together.

There you have it! A simple storage solution you can make yourself. And there is no limit to how many cubes you could build, I think I might add another two cubes onto this for all my other paper!

Have a wonderful Tuesday everyone!

-Alex

24/06/2013

Desk Storage

Good afternoon lovelies! I've been rearranging my desk and all my supplies to try and find a place for everything  that works best for me. But at the same time, I'm looking for more practical ways to store everything.
One thing that has stayed the same since "The Grand Tour" post, is the drawers on my large desk. I decided that the most practical thing for them, was to put things I use on a regular basis in them, without weighing them down too much. That being said, all my paper is stored elsewhere, but has also been moved since The Grand Tour. The top of my desk has also been rearranged a couple times, and will be changed again I think.


In the bottom drawer, I have all my handmade envelopes. The two rows on the left are wallpaper envelopes sorted by texture/pattern. To the right of those is a row of magazine envelopes made from Seventeen Magazine. To the right of those are Warhammer envelopes made from the magazine White Dwarf. Jon is a huge Warhammer enthusiast and recently subscribed to the White Dwarf. Once he read them, he gives them to me and has me make them into envelopes. He intends to send Christmas cards and Birthday cards to his friends in them. I think it's wonderful that our hobbies have overlapped a little bit!


In the drawer above that, I have wallpaper pieces that I chose not to use for envelopes for various reasons. The white ones on the bottom of the pile are "paintable" wallpaper. So I'm looking for something else that I could use them for. Some suggested testing out different kinds of paints on them and covering journals/notebooks with them. If anyone has any ideas that would be great! I also have a package of tissue paper, which will be used for tissue paper flowers in a later post. Once this wallpaper is used up, this drawer will hopefully be used for my always growing acrylic stamp collection.


In the drawer above that, I have a giant mess currently. I need to get drawer dividers, or more shoe boxes of varying sizes. What I have in here is a mixture of everything that I use on a regular basis, and thins I just wanted to get out of my old desk. In the box on the left I have all my foam squares, tape, Zots, cutting blades for my knife and paper slicer. I have a couple glue sticks, refills for my tape gun, and a few other adhesives I don't use very often. Above that I have tacks, post it notes and all my glue sticks. I also have my old tape gun that my mom got me for Christmas. In the middle I have all my punches and my circle cutter. Above them are my glue sticks for my glue gun, my glue gun, and my heat gun. On the right is a box of all my glitter. There is also a set of alphabet stamps that I've had since I first started scrapbooking.


The arrangement of my top drawer has changed a little bit since this photo, but the things in it has stayed the same. I have all my cricuit cartridges (not many), cutting mats, tool kit, scoring boards, hole punch, ink and mounting blocks, and my stamp cleaner in this drawer. A lot of what I use on a regular basis is stored in my carousel, but these items won't fit and so I store them here.

I'm slowly getting myself organized now that I have enough storage space for all of it. Tomorrow I'll show you all how I store my paper stacks now! I must admit though, the idea wasn't mine but I wish it was!

Have a wonderful Monday everyone!
-Alex

14/06/2013

Michaels Haul - #1

I won't post any of my previous Michael's Hauls because you can just visit my Facebook page (here) to see them. I will, however, share the most recent on from two weeks ago when I was passing through Saskatoon to visit some family. This was definitely the most expensive Michaels trip I've had thus far, the cheapest was a little over $200. But here's everything I bought and some things that came in the mail in the last week!


Four washitape dispensers, need the ones that stack on top of them! I'll share my washitape collection at the end of this post! A carousel for my desk. I'll share what I store in it, in a future post!


Foam adhesive squares, Zots glue dots and a bunch of Hello Kitty things for my penpals!


More washitape...of course! So in love with the camera's and film strip tape!


Jon (my boyfriend) found the middle moustache stickers, and my sister helped me find the other two. Jon also found the owls and I found the cute cameras! I hope to use the moustache's for various father's day cards and various funny cards like "I *moustache* you a question" and then have something adorable inside! The moustaches on the far right are fuzzy which is why I love them so much.


Top left: Martha Stewart trifold 36" x 24" cutting mat, metal ruler, fuzzy peaches (my fave), flower punch, and a flowered photo box.
Top right: Martha Stewart 12" score board, embossing tool kit and wide tip glue pen. Scotch tape gun and Fiskars cutting blades for my paper slicer.
Bottom left: Titanuim blade scissors, lined post it notes, 24 UHU glue sticks and ink for my printer (from Staples)
Bottom right: Large and small white button brads, black eyelets, small and large black button brads.


Aside from washitape, I'd have to say my other crafting weakness would be stamps. If anyone wants to see any of them better, simply let me know! (I had to get this off my Instagram since I accidentally deleted the original). The little square sets in the middle, were from the sale bin.


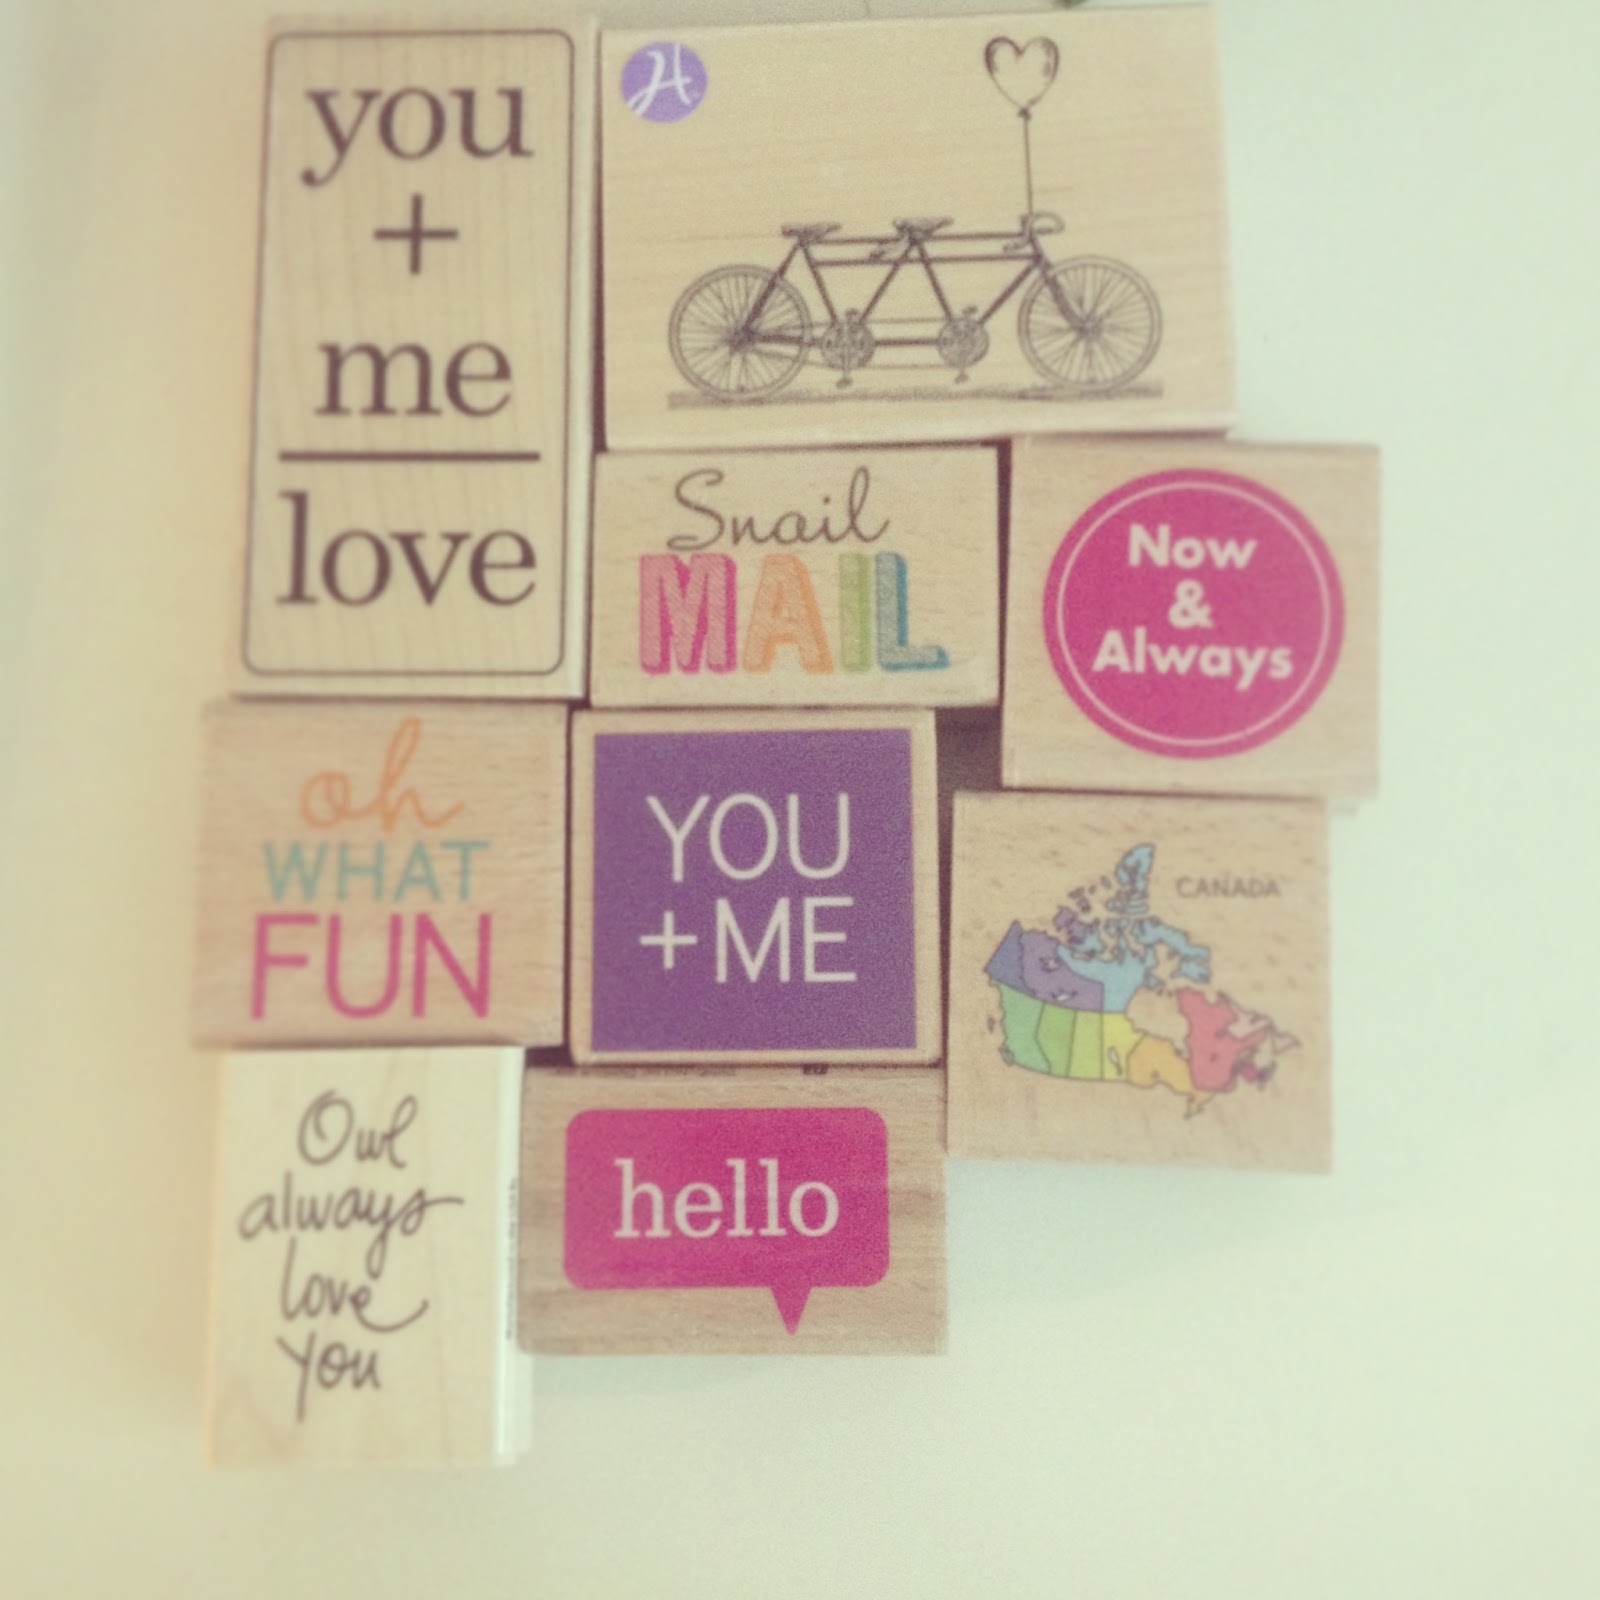
And of course, more stamps! Finally got my hands on the snail mail stamp that I've been eyeing since I started penpalling. The top left stamp (you plus me equals love) was one I saw my card idol use! So excited to use it for next years Valentine's Day cards. And of course a map of Canada! Somewhere I also have a "Canada Pride" stamp which I love using on my snailmail envelopes!

And that concludes my Michael's haul. However, I got some things in the mail that Jon ordered online for me. They arrived in the mail shortly after we got home.


Washitape from the Freckled Fawn grab bag sale. Which I was really excited about. You can visit their website (here) and keep in mind that they sell a lot more than washi tape!


This was my washitape collection (including a few duplicate rolls featured on the right above the orange chevron) before I got the ones featured a little further down the page. I know it's kind of got out of hand. When Jon counted it at this point, I had 100+


These are the beautiful stamps I ordered from Scrapbook Daily Deals. They post a new deal every day, you can visit their website (here)


I got these papers from Peachy Cheap (I think). They work similarly to Scrapbook Daily Deals. One deal every day, and only for a limited time. You can visit their site (here)


These may have come from either Peachy Cheap or Scrapbook Daily Deals (Can't remember). They basically run from the same place, so it doens't matter. But I love how perfect they are for Project Life (I'll talk more about it another time).


And more washitape! These loves came from Peachy Cheap and my favourite is the roll in the top left corner. It's got the days of the week on it, which would be perfect for a planner or Project Life!

And that's all the lovely craft supplies that I've gotten in the last couple of weeks (aside from the stamps post the other day!)

Have a wonderful day loves!
-Alex

13/06/2013

The Grand Tour

In the last two days, I've fought with the name, and decided to revert back to what goes on my cards and my Facebook page. However in the future, I think something that better reflects myself would be more appropriate. I also think that learning to use code and make my own template would be a good idea. I spent hours browsing for one that reflected me, and came up empty handed every time. But after changing it for the second time, I think I'm really happy with this. It's what I wanted! Yay me!

All of that aside, it's time for the photos of my craft space. I didn't take any close ups of how I organize things, I'll save those for later, but I thought I'd share the space I have to work in with all of you.


ABOVE: this is the view through my door. Yes the light switch is outside the room. Luckily it's no longer a dimmer switch..which was weird.


To your left is my craft space (and the bottles I need to put in the garage). The wooden unit in the bottom left corner, is where all my stampin up stamps are currently stored. They're in the first two drawers, but I want to reorganize them into all the drawers. I'll post more about that later.


To the right, is my living space, and the shelf I need to take a apart to reorganize my paper. Yes Pitch Perfect is playing in the background. And a Guy Faux mask is in the corner. The art on my wall I painted myself in highschool.


This is the view from between the bakers rack and the table you can sort of see in the first picture. this is where all the magic happens. The giant white desk is a sewing table I picked up from my neighbours garage sale. The filing cabinet, wooden shelf on the right, and the desk on the left came from my mom's house. The chair came with a desk I bought but gave my mom. My computer sits on the right, and my cricuit and printer are on the left. My carousel is hiding behind my laptop and the white things stacked near the middle of my desk are my washitape holders, which are currently empty. 


To the right of my desk is the filing cabinet. The drawers on top of that is where all my magazines for envelopes go. The photo boxes are where I store my Cards. Below that is my scraps box, stationery, and bead boxes that hold beads and gems. Below that is all my paper, and my project life (which has yet to be opened).


Turning towards my living space is the table where my boyfriend paints and assembles when he's over. The bakers rack holds all my magazines for crafting, washitape (suitcase), stickers (suitcase), wrapping paper, a magnet sheet, ribbon, cards I've received (bottom green box) and my twine (top green box). The wooden cabinet beside that was also bought at my neighbours garage sale and holds all of our board games, and extra tins that my boyfriend's mom sent over.


This is the desk to the left of my main desk. On top of it right now is snacks (I get hungry when crafting). My scissors have no current home so they sit there. My acrylic stamps sit beside them because I use them a lot. Then I have various tins on top to hold things I'm currently working on, or my incoming letters that need to be replied to. Below my desk is where I store extra file folders and all my letters. In the drawers are various things from ink for my printer to things for penpals, to garbage bags, and stamps I need to put into the stamp cabinet.

That's the mostly basic overview of my craft space. I'll share more detailed photos and ways that I organize myself in the future. Tomorrow I plan to work on putting all my wooden stamps away so I can show you the awesome cabinet they're stored in!

Have a lovely day!
-Alex