Recent Posts

Showing posts with label tour. Show all posts

08/07/2013

Stamp Storage

Good morning readers! I hope that you all enjoyed your weekend! When I wasn't at work this weekend, I was laying around instead of working on posts for this week, so my apologies with this being a little late!
Today I'm going to share with you, a unique piece of furniture that I currently use to store my wooden stamps. It's a great idea, but the size isn't very practical, and I'm still not sure how to arrange everything to get the most out of the piece. Suggestions are always welcome!


Here's the piece of furniture. It looks like sideways drawers. They slide out, and then swing to the left to allow you great access to everything in them. I picked this up at my neighbours garage sale (when I also picked up my desk). In the future, I'd like to change the hardware, and possibly the colour.


The first few drawers are too close to the wall to swing open, but they currently hold most of my Stampin Up sets. In a couple of places they're stacked in front of each other, but the ones in the back I don't use as often.


The middle drawer holds all the extra shelves from the smaller drawers. Mostly because the shelf that's in this one, is in the wrong spot, and it's currently stuck there. I didn't want to break it, so I just left it and piled extra shelves into it. I love that most of the shelves were adjustable, and in the future, they will come in really handy when I decided exactly how I want my stamps to be stored, or if I decide to just use it for something else.

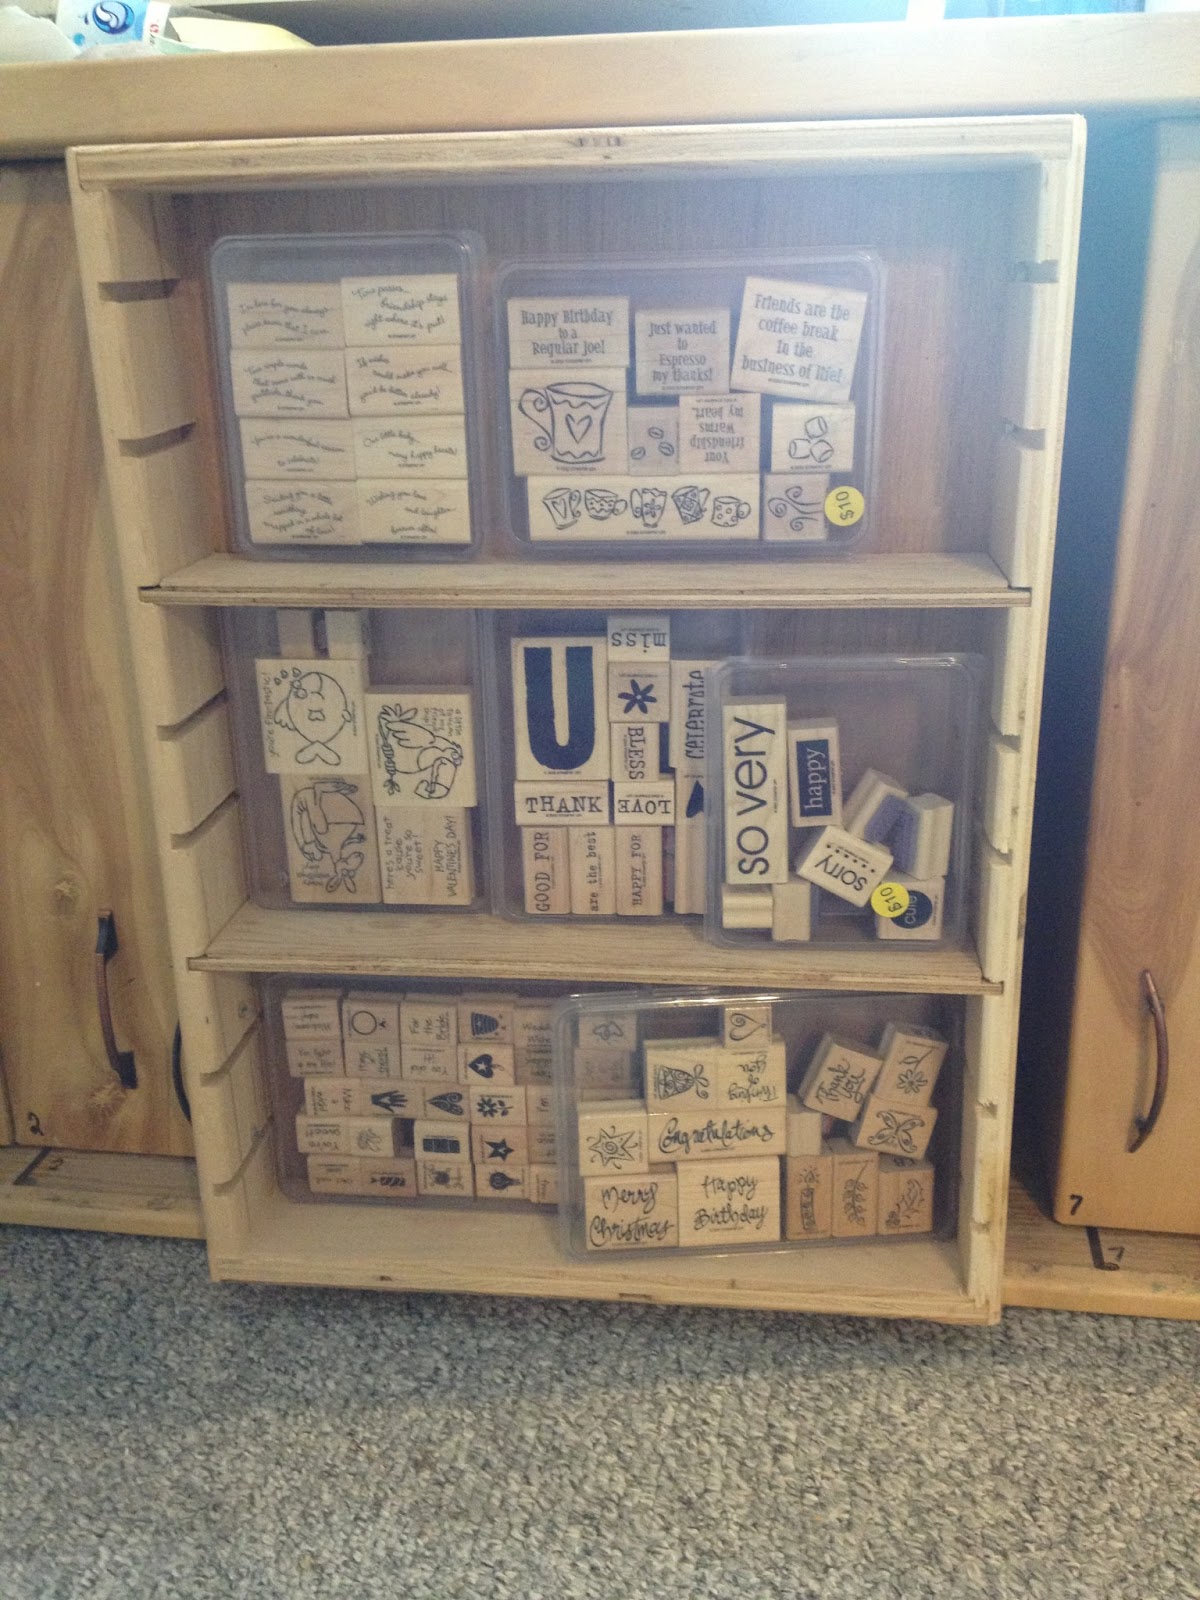

The Stampin Up sets that I use a lot more often are in the front drawers for easier access. You can also see how the drawers swing in front of the other ones to allow easier viewing of the drawer contents.


In the last drawer I have all of my loose stamps that I've picked up during multiple shopping trips. These I use a lot with my letters and outgoing mail. Having them stored like this makes me want to separate my Stampin Up sets and sort everything by occasion, but at the same time, I like that my Stampin Up sets are together so I can combine different stamps from the same set.

There are so many ways to store stamps, and currently, I feel as though this isn't working very effectively for me. My stamps are on the opposite side of my crafting space, because it's the only place this piece would fit without getting in the way. I feel like out of sight out of mind really applies to these. I seem to use my acrylic stamps more because they sit on my desk where I can see them. In the future I think I'd like to make a large shelf unit to place my stamps on so I can simply browse it and see every stamp I have, all at once. Maybe I'd use more of them!

Have a wonderful Monday!!
-Alex


26/06/2013

Personal Planner Turned Address Book

Good morning! Today I'm going to share a brief overview of my new address book. There are a few things I wish I had done differently now, but I'm still happy with how it turned out. I think it would have been better if I would have made them double sided, despite not wanting to. This way I could have inserted dividers so I could easily find the letter I was looking for.


As you can see here, it's almost crammed into it. I used cardstock because I wanted something sturdy that wouldn't bend or get damaged too easily. I don't want to have to spend more money than needed to remake it if it gets ruined. I alternated the pages between charcoal grey and raspberry.


This is what I see when I open it. In the left pouch I have my little calendar in which I keep track of mail coming in and mail going out so I know who's letter was sent when and can easily look it up if they ask. The striped cover I made myself using some scrap pieces. On the right is my black Sharpie Pen.
*I made note cards using this technique and I'll explain how to best achieve it in that post.


This is what my planning stage for this looked like. In the end, I moved the photo to the top, and cut 1/2" off the right side so that all my pages would fit. I made this template in Microsoft Word and typed everything out.
This is the template I used in Word. I made a table and split the row in the middle into two columns, one with three rows. Or you could make your table in Excel and simply merge the cells on the left into one, and leave the three on the right. Or you can come up with a layout all your own. I didn't want the borders in the middle to show, so I only turned on the outside borders. In word, the dotted lines show the border, and when printed it looks like the photo below. 

You could combine like/hobbies like I had in my original layout, and you could also insert the photo directly into the table. I cut the outside borders off of my printed copies, as they were only there so that everything was the same size when cut, without doing unnecessary measuring.


At the back of my address book, I inserted some adhesive mailing labels, and I also slid some smaller pieces of stationery into the back, in case I decide to write a letter on the go. 

And that's my address book! I'll ask a few penpals if they'd  be comfortable having me share their page (minus their address) so you can see what the finished page looks like and share that later!

Have a wonderful Wednesday everyone!
-Alex

13/06/2013

The Grand Tour

In the last two days, I've fought with the name, and decided to revert back to what goes on my cards and my Facebook page. However in the future, I think something that better reflects myself would be more appropriate. I also think that learning to use code and make my own template would be a good idea. I spent hours browsing for one that reflected me, and came up empty handed every time. But after changing it for the second time, I think I'm really happy with this. It's what I wanted! Yay me!

All of that aside, it's time for the photos of my craft space. I didn't take any close ups of how I organize things, I'll save those for later, but I thought I'd share the space I have to work in with all of you.


ABOVE: this is the view through my door. Yes the light switch is outside the room. Luckily it's no longer a dimmer switch..which was weird.


To your left is my craft space (and the bottles I need to put in the garage). The wooden unit in the bottom left corner, is where all my stampin up stamps are currently stored. They're in the first two drawers, but I want to reorganize them into all the drawers. I'll post more about that later.


To the right, is my living space, and the shelf I need to take a apart to reorganize my paper. Yes Pitch Perfect is playing in the background. And a Guy Faux mask is in the corner. The art on my wall I painted myself in highschool.


This is the view from between the bakers rack and the table you can sort of see in the first picture. this is where all the magic happens. The giant white desk is a sewing table I picked up from my neighbours garage sale. The filing cabinet, wooden shelf on the right, and the desk on the left came from my mom's house. The chair came with a desk I bought but gave my mom. My computer sits on the right, and my cricuit and printer are on the left. My carousel is hiding behind my laptop and the white things stacked near the middle of my desk are my washitape holders, which are currently empty. 


To the right of my desk is the filing cabinet. The drawers on top of that is where all my magazines for envelopes go. The photo boxes are where I store my Cards. Below that is my scraps box, stationery, and bead boxes that hold beads and gems. Below that is all my paper, and my project life (which has yet to be opened).


Turning towards my living space is the table where my boyfriend paints and assembles when he's over. The bakers rack holds all my magazines for crafting, washitape (suitcase), stickers (suitcase), wrapping paper, a magnet sheet, ribbon, cards I've received (bottom green box) and my twine (top green box). The wooden cabinet beside that was also bought at my neighbours garage sale and holds all of our board games, and extra tins that my boyfriend's mom sent over.


This is the desk to the left of my main desk. On top of it right now is snacks (I get hungry when crafting). My scissors have no current home so they sit there. My acrylic stamps sit beside them because I use them a lot. Then I have various tins on top to hold things I'm currently working on, or my incoming letters that need to be replied to. Below my desk is where I store extra file folders and all my letters. In the drawers are various things from ink for my printer to things for penpals, to garbage bags, and stamps I need to put into the stamp cabinet.

That's the mostly basic overview of my craft space. I'll share more detailed photos and ways that I organize myself in the future. Tomorrow I plan to work on putting all my wooden stamps away so I can show you the awesome cabinet they're stored in!

Have a lovely day!
-Alex