Recent Posts

29/11/2013

Panda Christmas Cards

I made Jon's parents' Christmas cards last year and they were such a hit with all of their family, that she asked me to make them again this year. The only criteria I was given was that she wanted there to be green on them this year. With that in mind, Jon and I contemplated ideas and I scoured Pinterest and card magazines and I found this sketch.


I used the sketch as a guide, but adjusted it slightly to work in my favour for this card.


I made the card 4 1/4" x 5 1/2" instead of the long narrow rectangle of the sketch and I moved the string to the bottom to balance it out.


The panda was cut using the Create a Critter cartridge and my Cricut. I cut the circles using my Silhouette Cameo to ensure that they were all uniform. The Santa hat was cut using the Wrap it Up cartridge for my Cricut. I used a wreath stamp and bronze ink to add a little shine to the circle.


I cut the green vine paper so that the patter on each card matched up on each of the strips.


I wrapped the string around the red panel of the card and tied it into a bow and then adhered the red panel onto the white card base. 


Here's a side view of the card. I need to find a sentiment stamp to put inside.

Christmas is possibly my favourite holiday and I've been browsing Pinterest for Christmas decor ideas that I can make. I love Christmas and I'm so glad we finally have a house to decorate.

Have a great weekend everyone!
-Alex

28/11/2013

Christmas Card Supply Haul

Alright, so my birthday was on November 5th (V for Vendetta). We were going to go to the city for a Michael's / Ikea trip, but the roads were terrible and we couldn't go. To make up for it, Jon and I did some shopping in town instead. We bought a bunch of things for the house (which I'll share later), and I bought some much needed scrapbooking supplies.

I went to a local scrapbook/photography shop and bought practically everything Christmas they had.


I bought this Bazzil Basics Paper stack. I loved the variety of patterns and colours. 


I bought two of these Bo Bunny Christmas paper collections. They're beautiful!


This is silver metalic paper. It's super reflective so I placed a piece on top to only show a sliver of its metallic surface. I have a few sheets of gold as well that I bought last year. 


I bought one sheet (might go pick up more) of this beautiful red green and cream striped paper. 


This photo doesn't do this paper justice, the vines are metallic gold and they're beautiful. I bought four sheets of this to do my in-laws Christmas cards.


I also added some more little inks to my collection. I almost need to make a list of what I have so I don't buy duplicates! I'll share my little ink collection later.


I also bought a bunch of Christmas Stamps. As if I don't already have a crazy amount of stamps, I bought almost every Christmas stamp set they had. 


I love the Happy Holidays stamp, and the ornaments. So pretty on a corner of a card or gift tag.


I love the deer and the wreath on this one. I also love the little tree, so cute.


I bought these so that when I finally got around to starting my Project Life, I had stamps to use when Jon and I were doing things outside, or if I had photos of the weather. I also simply loved the skates and the sleigh.


The wreath on this one! It's absolutely perfect for my in-law's Christmas cards. It adds exactly the right touch. I also loved the vines in this set.


I love the variety of stars and the two trees. The one thing I love about Christmas is trees! Unfortunately we can't afford a tree this year, so we're using the tree I had in college (I'll share when we make space and put it up).


I bought this one mostly for the sentiments, but the holly stamp is growing on me.


This one has cute to and from stamps. I also loved the cupcake. 


This was one of the first ones I picked up. I love the snowflake and the tree which has the snowflake pattern on it. So pretty! I was mostly looking for different sentiment stamps for the front of my own cards.

My favourite holiday is probably Christmas. I love buying things for my family, though this year will be on a tight budget since we just moved and everything. Maybe next year we can buy a bunch of decorations and host Christmas here with the family!

Have a wonderful day!
-Alex

27/11/2013

Washitape Wednesday

It's that time again! I really wish I had some Christmas washitape, but I haven't been to Michaels since August! It feels like a lot longer, but it really hasn't been that long. Perhaps in November I'll be able to get to Michaels and pick up some Christmas goodies to finish up some penpal packages, cards and blog posts.

Anyways, onto the third of my giveaway congratulations cards.


With this card, I wanted to try something different with my tape. I've always put it into white paper, so with this card, I put it straight onto the black paper. 


In this close up, you can see that the black of the paper doesn't show through very well, but it still makes the colours a lot brighter. I stuck to mint and pink tapes for this one.


I used the same congratulations stamp, and a leftover piece of paper from a Christmas card I'm working on. I inked the edges with blue to make it pop a little.


Here's a side view of the card. I inserted a white piece inside the card to make it easier to write in. 

Hope you all have a wonderful Washitape Wednesday! I'd love to see your projects, leave a link in the comments, or email me! creationsbycoal@gmail.com

-Alex

26/11/2013

DIY Mod Podge Jar

I've been slowly settling into my craft room and trying to get myself organized. I've also been working really hard on keeping up with the blog, and all of my penpals. The challenge I'm currently facing is making time for everything after working all day. I really need to figure out how to balance everything, or start making sacrifices. That being said, I've been trying to make really simple things for the blog that help me get organized in my craft space, and around the house, or for my penpals. That way I can get a bunch of things done at once. That being said, some of my posts may contain things pertaining to other aspects of my life (work, penpals, organizing the house).

While organizing, I realized that it didn't make sense for me to have all my writing pens in my carousel on my desk if I have a small writing desk where I'll be writing all my letters. I found an empty jar and decided that it was boring so I dug out some tissue paper and my mod podge and made the jar prettier.


I used wrap & unwrap tissue paper that I picked up at a Chapter's Book Store, and some twine I had laying around.


I used two colours of twine and tied them in a bow.


I folded the ends down over the bottom, and put a scrap piece over it to secure them.

I don't have an official tutorial for this, but to do something similar with tissue paper or other paper, start by covering the outside of your jar or container with mod podge. Starting with the middle of your paper press it onto the jar gradually moving out to the edges. Let it sit for a while then brush mod podge over the top of the paper to seal it. Feel free to add embellishments to the jar as desired.

So simple and so quick. You could have kids do it with little squares of different coloured tissue paper!

Hope everyone has a great day!
-Alex 

25/11/2013

Pink & Sage Celebrate

Ever time I turn around, I feel like I don't have enough birthday cards. Why does everyone have to have a birthday? Just kidding. I've been trying to use up more of my scrap paper because I currently have a box almost overflowing with paper that I've cut pieces from and never used again. This card was made using the left over paper from Friday's Gift Card Holder card.


I added the green behind it to add a bit more depth and make the floral paper stand out more.


You can't really tell, but I inked the edges of the celebrate piece with two different shades of pink. I used sage green ink to stamp the sentiment.


I used my Martha Stewart Doily border punch on the front edge of the card and adhered a piece of white paper to the inside edge on the back of the card. Then I inked the edges with the sage green ink again.


Here's a side view of the card. I adhered the celebrate piece with foam squares, and you can see how I attached the white piece inside the card. Perhaps next time I'll adhere a full white piece inside, or stamp something down the white edge inside the card.

There you have it! I suppose I should stop procrastinating and start working on my Christmas cards at some point! Going to Edmonton tomorrow, which means a trip to Michaels, and some Christmas shopping! Yay!

Have a wonderful day everyone!
-Alex

22/11/2013

Gift Card Holder

Sometime I don't know what to get people, so I buy them a gift card to a store they love so they can pick something out themselves, or in the case of Jon's sister, she asked for gift cards so she could redecorate her house. Rather than just throw a gift card into a card, I decided to make a card to hold her gift card. I found a tutorial for this card on Youtube. I'll include a link at the end of this post!


Here's a photo of the inside of the card (I made this after I sent her card to her so I didn't have a card to put into it). The gift card goes under the ribbon on the middle rectangle. The gift card is attached with tape just to ensure it stays, and the sentiment goes on the white rectangle on the bottom. 


Here's what it looks like when it's all tied up in a pretty bow! So pretty!


I'm obviously a terrible bow tier, but otherwise it turned out really nicely.


Here's a close up, I inked the edges of the floral paper before I adhered it to the pink paper.


Here's the side view of the card. Aside from the bow, the card isn't any thicker than a normal card.

This card is so simple to make (after you try it once). I'm probably going to make it a lot if I have gift cards to give to people. 


Incase the video above doesn't work, here's a link to the Youtube Tutorial.

Have a wonderful day!
-Alex

21/11/2013

Congrats On Your Baby!

I love when people have babies, they're so adorable! Our renter (who also works for Jon's parents) recently headed back to the Philippines for the birth of his and his wife's baby. Everyone at work was giving money to buy some small things for him to take back for the baby, so Jon asked if I could make a card to go with all of it as well.


No one told me what they were having, so I wanted to make it as gender neutral as possible, without being boring and monotone. I knew I wanted to use the polka-dot paper for sure because it matched all the colours I wanted to use, and opened up the possibility of using other colours.


I made the card white, then layered the green paper on top, and the polka-dot paper on top of that. I rounded the corners of the gaga baby tag, and used foam squares to adhere it.


I stamped congratulations with sage green ink, and cut it out of the white paper I stamped it on. I used yellow washitape and another piece of white paper to create the banner in the back, and I used my Martha Steward doily border punch on the bottom of the green paper. I didn't attach the bottom of the yellow banner, I thought about curling the ends a bit, but decided it looked fine.


Here's a side view of the card. The gaga baby tag and congratulations are adhered using foam squares. You can also see my TV calendar in the back, my empty cup of tea from work, and my water. ;)

The tag and the polka-dot paper came from an old K&Company baby paper stack I found when I was unpacking. I almost forgot I had it. It was one of my first paper stacks.
It feels so good to be back making cards for all of you. If any of you are actually still there...
Have a wonderful day!
-Alex

20/11/2013

Washitape Wednesday

I've missed this post over the last few weeks. I used to get so excited for Wednesdays simply because they allowed me to pull things out of my hat and get creative with my washitape.

As stated in my last Washitape Wednesday post, I mentioned the instagram giveaway that I held back in August. Today I'm sharing the second of four cards I made to congratulate all my lovely winners.


I picked colours from the floral tape, and added the green flower to break up the pink and white of the banner piece. I love the simple elegance of this card, can't wait for the winner to receive it and all the goodies I'm sending her way as well!


Here's a slightly blurry close up of the tapes I used. The light pink really did come from that tape! Plus I love a good floral patterned tape.


I used a plan silver brad to secure the flower, and foam squares so adhere the striped piece to the card.


I inked the edge of the congratulations piece with green ink to match the flower. The congratulations stamp is by Martha Stewart.


Here's a side view of the card and a peak at my messy desk!

Hope you all have a wonderful Washitape Wednesday! Don't forget to share your washitape projects with Tiffany over at Crafting a Fairytale.

-Alex

19/11/2013

Happy Crafty Mail

I'm so excited! I haven't been to Michael's since August and I'm going crazy. I mean, I don't really NEED any craft supplies, but because I've bought new items roughly once a month for so long, it's unusual for me to have not bought anything in so long.

At the start of October I couldn't take it any more. I caved and bought Washitape from Pick Your Plum. Then Peachy Cheap and Scrapbook Daily Deals had grab boxes for reasonable prices, and I bought one from each of them (with shipping it came to $100 for both). Now I'll share what I got, I can't remember which grab box came from which site, but because they run from the same place, I got some duplicate items in them.


First up, I'm sharing the bright and fun washitape from Pick Your Plum. They fit nicely with the rest of my growing washitape collection!


Next up we have the stamps I ordered from Peachy Cheap. I love this first set, mostly because of the date stamp. I'm also in love with the three stamps at the bottom.


I love the quote at the top of this set. "I love you today, tomorrow & forever". It's so sweet!These will definitely be used for my Project Life (when I get it started).


I love t he date stamp on this one too! I plan ot use it for my letters (and Project Life of course). I'm also a huge fan of the glasses.


My favourite on this set are the phone, and the moustache. The only thing I love as much as owls, are moustaches. So excited to finally have one moustache stamp.

Now we get into the boxes I got! So excited to share this all with you!


First up, I got two packages of these adorable journalling cards. 


Here's the front side of each card.


Here's the backside of each card.


I also got these stamps. I'd debated picking them up a couple months back, but decided against it, now I have them anyway! Yay!


This is a terribly blurry picture, but they're 7Gypsies tag pockets. They're the cutest!


I'm not usually a fan of rub ons, but I love these!


I wish they would have sent 12 months, or at least 6 months in order, but instead I have three months, and a few random words.


I got some embelishments from Glitz design, My Mind's Eye, Sweet Surrender and Teresa Collins


I got some kraft paper heart stickers from Studio Calico.


Here's a close up of the hearts.


These key die cuts are supposed to be sticky on the back, but most of them weren't even attached to the sheet they came on. But they're super pretty!


Glitz design Peek-A-Boos, and Whatnots. I love Glitz products, they're beautiful. 


This vintage collage pack. Everything is so pretty. 


Here's page one.


Page two.


Page three.


I also got this package of paper, die cuts and stickers from Crate Paper.


This is the prettiest bunting I've ever seen. It's 5th & Frolic Bunting by Dear Lizzy. I love the 5th & Frolic Project Life edition, so I'm super excited about this.


These are like the keys, and like the keys they didn't stick to the sheet.


I'm in love with this tape. I got two sets (which I'm pumped about!). It's called Stationery Tape. It's transparent, and comes in all the colours pictured above.


I love the gem brads in the top right. I also got a package of Petaloo flowers, and My Mind's Eye enamel dots from the My Girl collection.


I love the skeleton ribbon! I don't usually do Halloween crafts, but I'm excited about the skeleton ribbon, I'm sure I'll find something to use it for. On the right are Crate Paper Sew Brads. Love them!


I got two of these Halloween Journals, I might do a giveaway, or swap them with penpals who like Halloween things!


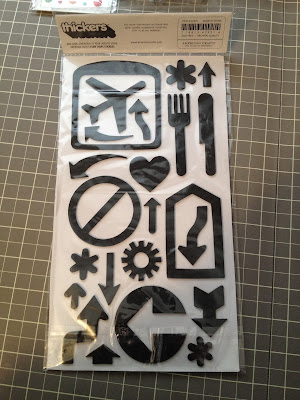
I got Subway Accents thickers. Here's the front side.


And here's the back side of the thickers.


Pink Paislee Luxe Hearts. It's so metallic and shiny!


Two packages of Art C mixed fibres. The purple package has cord, wire, and suede. The blue package has wire and two suede. On the right is yellow lace tape.


I also got a second set of paper, die cuts and stickers from crate paper.


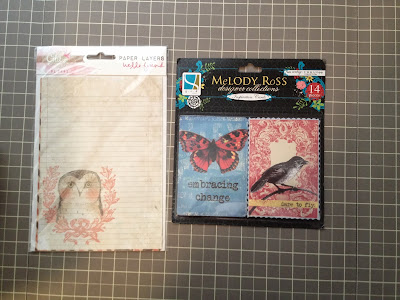
I also received some lovely Glitz Design Paper Layers, and Melody Ross cards.


Here's what the Melody Ross cards look like!

There you have my crafty haul! I can't wait to use some of these things, and share the ones I won't use with friends. 

Have a wonderful day!
-Alex