Recent Posts

Showing posts with label craft space. Show all posts

08/07/2013

Stamp Storage

Good morning readers! I hope that you all enjoyed your weekend! When I wasn't at work this weekend, I was laying around instead of working on posts for this week, so my apologies with this being a little late!
Today I'm going to share with you, a unique piece of furniture that I currently use to store my wooden stamps. It's a great idea, but the size isn't very practical, and I'm still not sure how to arrange everything to get the most out of the piece. Suggestions are always welcome!


Here's the piece of furniture. It looks like sideways drawers. They slide out, and then swing to the left to allow you great access to everything in them. I picked this up at my neighbours garage sale (when I also picked up my desk). In the future, I'd like to change the hardware, and possibly the colour.


The first few drawers are too close to the wall to swing open, but they currently hold most of my Stampin Up sets. In a couple of places they're stacked in front of each other, but the ones in the back I don't use as often.


The middle drawer holds all the extra shelves from the smaller drawers. Mostly because the shelf that's in this one, is in the wrong spot, and it's currently stuck there. I didn't want to break it, so I just left it and piled extra shelves into it. I love that most of the shelves were adjustable, and in the future, they will come in really handy when I decided exactly how I want my stamps to be stored, or if I decide to just use it for something else.


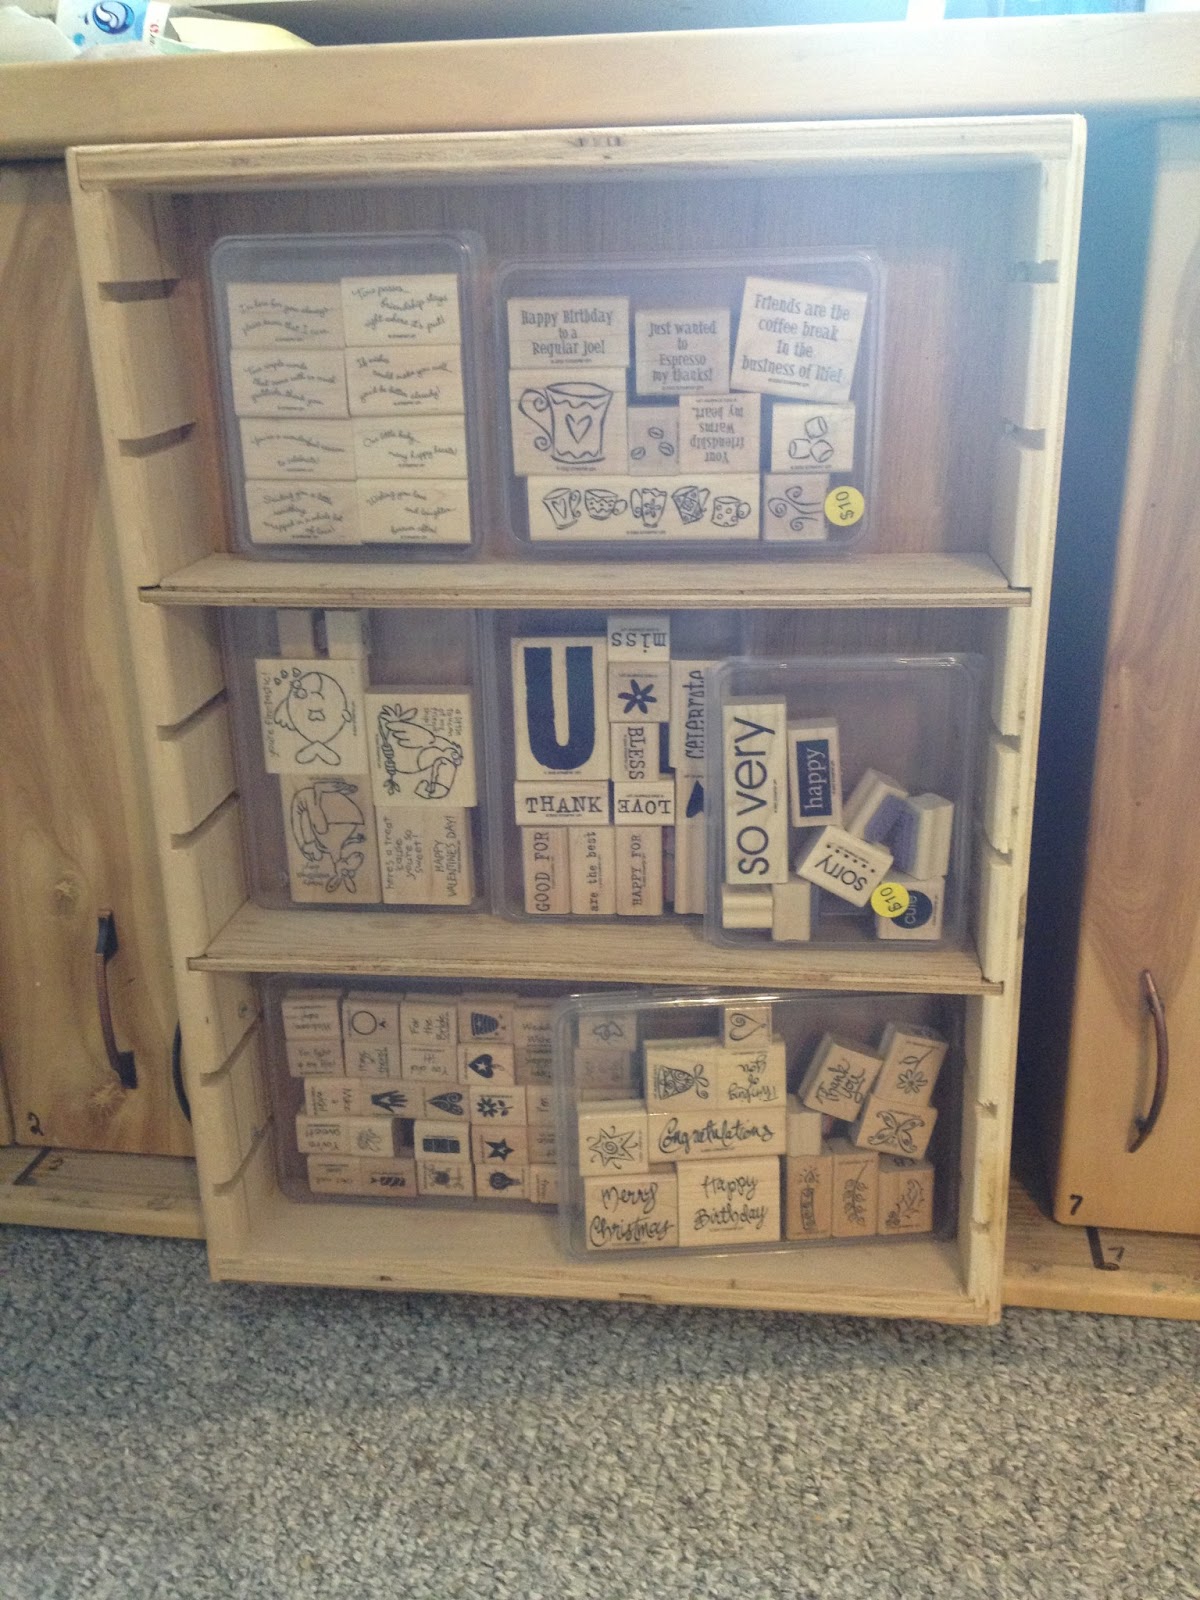
The Stampin Up sets that I use a lot more often are in the front drawers for easier access. You can also see how the drawers swing in front of the other ones to allow easier viewing of the drawer contents.


In the last drawer I have all of my loose stamps that I've picked up during multiple shopping trips. These I use a lot with my letters and outgoing mail. Having them stored like this makes me want to separate my Stampin Up sets and sort everything by occasion, but at the same time, I like that my Stampin Up sets are together so I can combine different stamps from the same set.

There are so many ways to store stamps, and currently, I feel as though this isn't working very effectively for me. My stamps are on the opposite side of my crafting space, because it's the only place this piece would fit without getting in the way. I feel like out of sight out of mind really applies to these. I seem to use my acrylic stamps more because they sit on my desk where I can see them. In the future I think I'd like to make a large shelf unit to place my stamps on so I can simply browse it and see every stamp I have, all at once. Maybe I'd use more of them!

Have a wonderful Monday!!
-Alex


25/06/2013

Paper Stack Storage Solution

Alright, so for those of you who know me, I have a love of paper. There has only been a handful of times that I've gone shopping, and not bought at least one paper stack. Unfortunately, that means that I have A LOT of paper.
I don't know that there is any right way to store it, but while browsing my Instagram feed, I came across a crafty lady who had come done what I'm about to show you. I thought it was the smartest thing I'd ever seen!
At some point I'd like to get more shelves so I can store all of my paper this way, and not just my paper stacks.
So, there's my shelf. I'm sure you've seen them at Walmart and thought "What would I ever use that for? Things would fall through the holes". They also have fabric boxes that could fit into the cubes. It worked for other things for a while, but I decided that it wasn't working for me that way. So I took it apart and found some metal ties (metal twist ties from bread or garbage bags work).


I assembled two of the cubes and used the remaining pieces (plus two I took from another one of these) to make this. I used twist ties to secure each shelf to the outside in five places. Two on either side and one on the back in the middle. Then I slid all of my paper stacks into it and ta da. You could also use this for individual sheets, just put similar patterns/colours together.

There you have it! A simple storage solution you can make yourself. And there is no limit to how many cubes you could build, I think I might add another two cubes onto this for all my other paper!

Have a wonderful Tuesday everyone!

-Alex

24/06/2013

Desk Storage

Good afternoon lovelies! I've been rearranging my desk and all my supplies to try and find a place for everything  that works best for me. But at the same time, I'm looking for more practical ways to store everything.
One thing that has stayed the same since "The Grand Tour" post, is the drawers on my large desk. I decided that the most practical thing for them, was to put things I use on a regular basis in them, without weighing them down too much. That being said, all my paper is stored elsewhere, but has also been moved since The Grand Tour. The top of my desk has also been rearranged a couple times, and will be changed again I think.


In the bottom drawer, I have all my handmade envelopes. The two rows on the left are wallpaper envelopes sorted by texture/pattern. To the right of those is a row of magazine envelopes made from Seventeen Magazine. To the right of those are Warhammer envelopes made from the magazine White Dwarf. Jon is a huge Warhammer enthusiast and recently subscribed to the White Dwarf. Once he read them, he gives them to me and has me make them into envelopes. He intends to send Christmas cards and Birthday cards to his friends in them. I think it's wonderful that our hobbies have overlapped a little bit!


In the drawer above that, I have wallpaper pieces that I chose not to use for envelopes for various reasons. The white ones on the bottom of the pile are "paintable" wallpaper. So I'm looking for something else that I could use them for. Some suggested testing out different kinds of paints on them and covering journals/notebooks with them. If anyone has any ideas that would be great! I also have a package of tissue paper, which will be used for tissue paper flowers in a later post. Once this wallpaper is used up, this drawer will hopefully be used for my always growing acrylic stamp collection.


In the drawer above that, I have a giant mess currently. I need to get drawer dividers, or more shoe boxes of varying sizes. What I have in here is a mixture of everything that I use on a regular basis, and thins I just wanted to get out of my old desk. In the box on the left I have all my foam squares, tape, Zots, cutting blades for my knife and paper slicer. I have a couple glue sticks, refills for my tape gun, and a few other adhesives I don't use very often. Above that I have tacks, post it notes and all my glue sticks. I also have my old tape gun that my mom got me for Christmas. In the middle I have all my punches and my circle cutter. Above them are my glue sticks for my glue gun, my glue gun, and my heat gun. On the right is a box of all my glitter. There is also a set of alphabet stamps that I've had since I first started scrapbooking.


The arrangement of my top drawer has changed a little bit since this photo, but the things in it has stayed the same. I have all my cricuit cartridges (not many), cutting mats, tool kit, scoring boards, hole punch, ink and mounting blocks, and my stamp cleaner in this drawer. A lot of what I use on a regular basis is stored in my carousel, but these items won't fit and so I store them here.

I'm slowly getting myself organized now that I have enough storage space for all of it. Tomorrow I'll show you all how I store my paper stacks now! I must admit though, the idea wasn't mine but I wish it was!

Have a wonderful Monday everyone!
-Alex

13/06/2013

The Grand Tour

In the last two days, I've fought with the name, and decided to revert back to what goes on my cards and my Facebook page. However in the future, I think something that better reflects myself would be more appropriate. I also think that learning to use code and make my own template would be a good idea. I spent hours browsing for one that reflected me, and came up empty handed every time. But after changing it for the second time, I think I'm really happy with this. It's what I wanted! Yay me!

All of that aside, it's time for the photos of my craft space. I didn't take any close ups of how I organize things, I'll save those for later, but I thought I'd share the space I have to work in with all of you.


ABOVE: this is the view through my door. Yes the light switch is outside the room. Luckily it's no longer a dimmer switch..which was weird.


To your left is my craft space (and the bottles I need to put in the garage). The wooden unit in the bottom left corner, is where all my stampin up stamps are currently stored. They're in the first two drawers, but I want to reorganize them into all the drawers. I'll post more about that later.


To the right, is my living space, and the shelf I need to take a apart to reorganize my paper. Yes Pitch Perfect is playing in the background. And a Guy Faux mask is in the corner. The art on my wall I painted myself in highschool.


This is the view from between the bakers rack and the table you can sort of see in the first picture. this is where all the magic happens. The giant white desk is a sewing table I picked up from my neighbours garage sale. The filing cabinet, wooden shelf on the right, and the desk on the left came from my mom's house. The chair came with a desk I bought but gave my mom. My computer sits on the right, and my cricuit and printer are on the left. My carousel is hiding behind my laptop and the white things stacked near the middle of my desk are my washitape holders, which are currently empty. 


To the right of my desk is the filing cabinet. The drawers on top of that is where all my magazines for envelopes go. The photo boxes are where I store my Cards. Below that is my scraps box, stationery, and bead boxes that hold beads and gems. Below that is all my paper, and my project life (which has yet to be opened).


Turning towards my living space is the table where my boyfriend paints and assembles when he's over. The bakers rack holds all my magazines for crafting, washitape (suitcase), stickers (suitcase), wrapping paper, a magnet sheet, ribbon, cards I've received (bottom green box) and my twine (top green box). The wooden cabinet beside that was also bought at my neighbours garage sale and holds all of our board games, and extra tins that my boyfriend's mom sent over.


This is the desk to the left of my main desk. On top of it right now is snacks (I get hungry when crafting). My scissors have no current home so they sit there. My acrylic stamps sit beside them because I use them a lot. Then I have various tins on top to hold things I'm currently working on, or my incoming letters that need to be replied to. Below my desk is where I store extra file folders and all my letters. In the drawers are various things from ink for my printer to things for penpals, to garbage bags, and stamps I need to put into the stamp cabinet.

That's the mostly basic overview of my craft space. I'll share more detailed photos and ways that I organize myself in the future. Tomorrow I plan to work on putting all my wooden stamps away so I can show you the awesome cabinet they're stored in!

Have a lovely day!
-Alex