Recent Posts

Showing posts with label hearts. Show all posts

17/01/2014

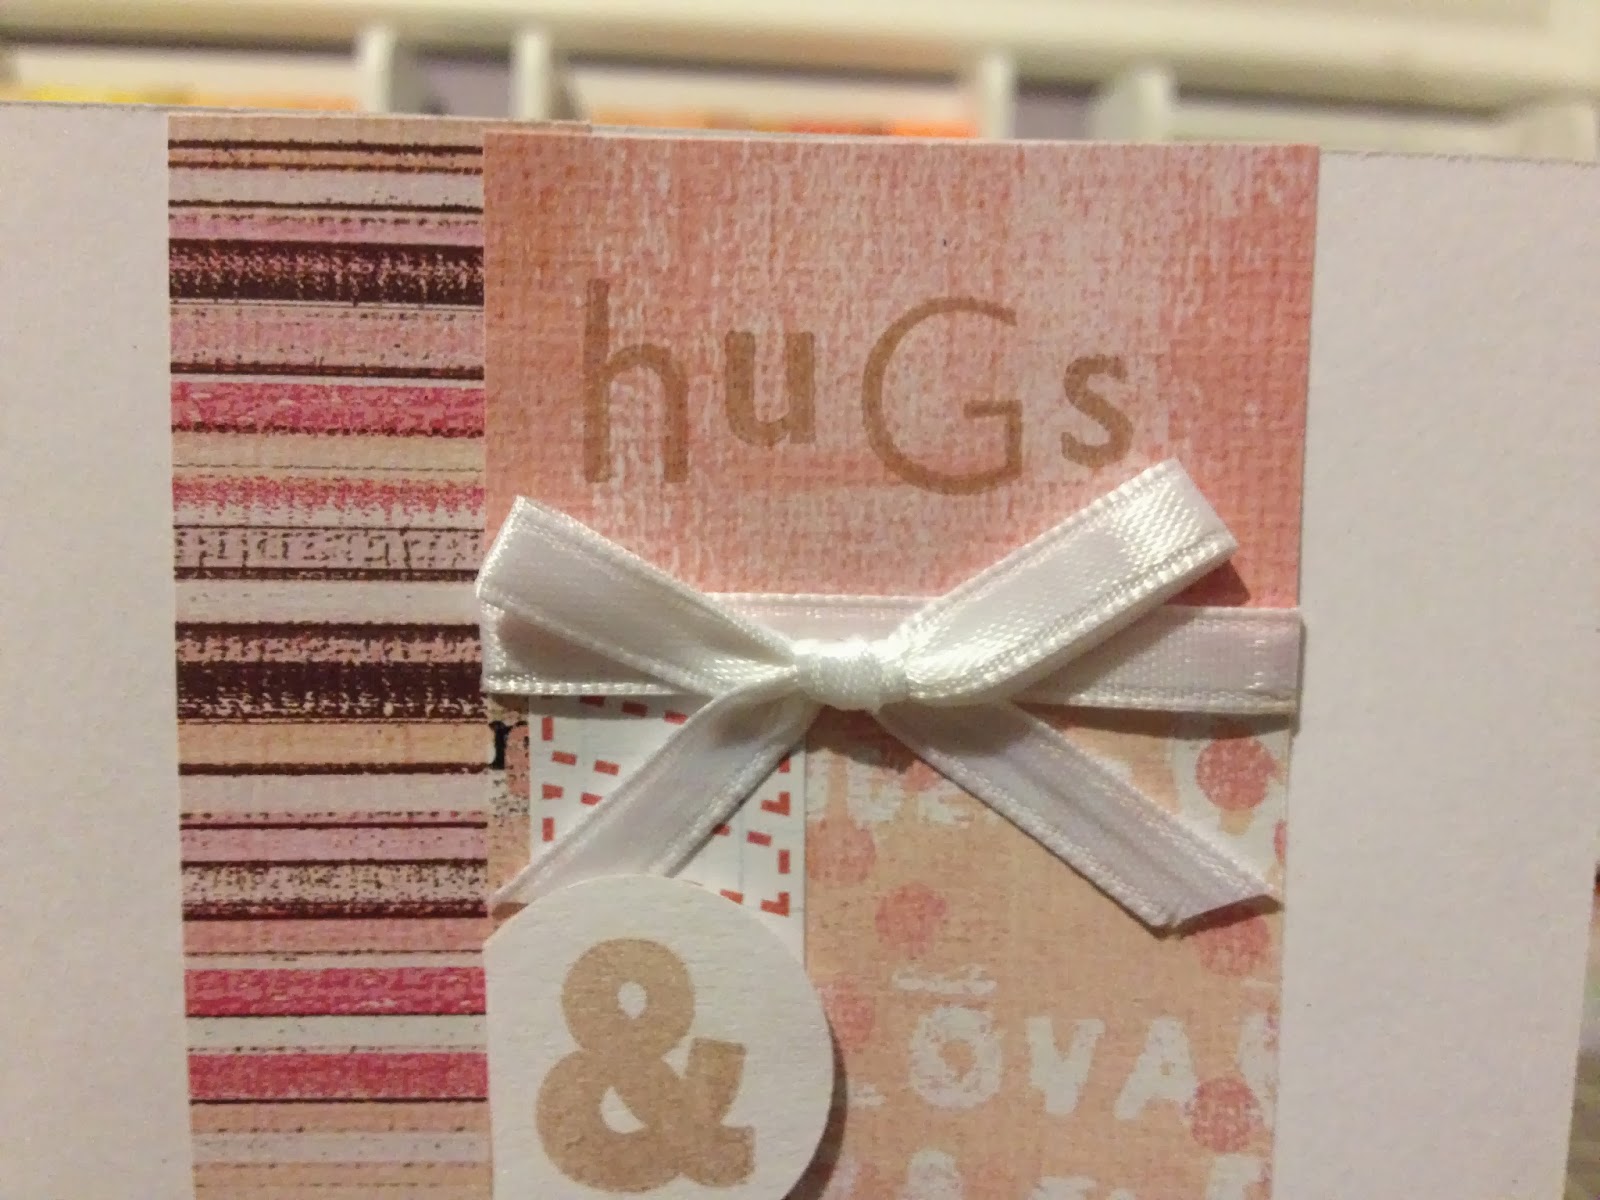
Hugs & Kisses - Valentine's

This was one of my favourite cards that I made last year for Valentine's Day. It was inspired by one I found on the Michael's Pinterest. I improvised it a little bit, and made this lovely card.


 This card is very pink, and girly. I selected the papers for this one very carefully. I wanted them to go well together without being too monochromatic. I think I got the perfect balance.


The ribbon hides the seam between the solid pink piece on the top, and the lighter pink piece on the bottom. The circle with the & on it was tripped on one edge and adhered with a foam square.


I used varying lengths and widths of paper for the banners. I didn't want two strips to be the same. I stamped the sentiment with brown ink.

Here's a side view of the card. This card measures 4 1/4" x 5 1/2". I've used a similar style on other cards that I've made.

Do you usually buy your significant other a store bought card, or do you purchase/make a handmade card for them? Personally, I love handmade cards, but because I make them, my family feels it would be weird to buy one of my cards only to give it right back to me.

Have a wonderful day!
-Alex

15/01/2014

Nuts About You & I Heart You - Valentine's

Valentine's Day is coming up. Instead of making new cards (partly because I hate the holiday), I'm going to sell the a few I made last year. I'll stamp something cheesy inside and lower the price a little bit.

Today I'll share two, and on Friday I'll share two more. I have to work the next few days and due to a lack of inspiration, nothing crafty has been created this week. I did however work at reorganizing the craftroom a little bit, so hopefully photos next week!


Everything on this card was made using one of my Cricut cartridges. I think it was the Create a Critter.


Here's a side-view of the card. It only measures about 4" x 4".  I suppose I could have made it larger and embellished more, but I'm a simple person (or boring, depending how you look at it). 


I used red ink on the edges. The red is layered on top of the white.


The letters on this one was cut from the Cricut as well. I think it was also from the Create a Critter.


The red striped paper is layerd ontop of the black. 


Here's a side-view of the card. This one only measures 5" x 4" or so. I had to make a couple of them smaller so they would fit into the holders that work bought for me to put them into.

Definitely not some of my best work, but last year Jon decided that I should sell cards at work. These were made a week before Valentine's Day, which I consider to be a Hallmark holiday, and insisted that Jon refrain from getting me anything. He does so much for me throughout the year, that I don't need him to spend ridiculous amounts on overpriced chocolate and flowers simply because society says he should.

I hope everyone has a wonderful day. Only another month until the most pointless of holidays, though if you do enjoy it, I apologize if I offended you in anyway. I'll try and get something new and crafty made for next week, but my entire schedule has been off since Christmas and it's taking a while for me to readjust to working and sleeping later than usual.

-Alex

11/07/2013

Wax Paper Gift Wrap

Today's tutorial is for wax paper gift wrap.
I first discovered it on Pinterest. The pin led me to Martha Stewart's website with a short described tutorial. It wasn't very helpful, and after one failed attempt, I discovered a different way to do it that gave the same result, but was easier to do.

Here's what you need:
  • iron, set to medium heat, and an ironing board or table cover (towels work as well)
  • 2 sheets of wax paper cut to desired size (I used 16" x 20")
  • tissue paper in desired colours (I used pink and purple)
  • paper towel larger than your pieces of wax paper
  • scissors, craft knife and or craft punch (I used my Martha Stewart heart punch)

I started out by cutting one sheet of each colour of tissue paper into easier to fold pieces. I cut it into 1/3 and 2/3 pieces. Then cut the 2/3 piece in half.


I folded it so that there were 16 layers. 


I punched out a few hearts (all 16 layers).


I separated the heart, keeping 5-6 layers together. You don't need more than 4 if they remain together, but more if they become separated. 


Then I laid out my table top ironing mat onto my table (technically Jon's painting table). I put paper towel on top of it and turned my iron onto medium and let it heat up while I cut my wax paper.


I cut four sheets to start because I knew I'd probably screw up at least once so I wanted to have a back up for this post. 


 I placed one sheet of wax paper onto my paper towel covered ironing mat. I placed my hearts on the wax paper, layering extra where needed.


I layered paper towel on top of my wax paper and ran my iron over it as if I were ironing a shirt. Your wax paper layers should adhere to each other. There may be air bubbles and the edges might not always adhere completely, but I haven't exactly 'ironed' that out yet. That was a terrible joke.


When you're finished it should look something like this. It looks different when held up. From here you can wrap cookies or a loaf and give them as a gift, or you could turn them into envelopes.


I decided that instead of ruining my second sheet, pictured above, I used my terrible first attempt. The hearts would be brighter and more noticeable. I used my tape gun to hold it together, but I think I'll try tucking folded paper towel into the envelope and ironing the edges together to secure them. You could also use colourful staples or you could sew them together by hand.

Hope you all have fun with this one! I'd love to see your projects! Feel free to e-mail them to me and I'll put together a post of your submissions in the future.

Have a great day!
-Alex